Locations
Learn how to organize equipment by location in Kuviq.
Overview
Locations represent physical areas where equipment is stored or used. A well-organized location structure helps you:
- Find equipment quickly
- Assign inspectors to specific areas
- Generate location-based reports
- Restrict user access by area
Location Types
Common location types include:
| Type | Examples |
|---|---|
| Buildings | Headquarters, Warehouse A, Factory 1 |
| Floors | Floor 1, Ground Floor, Basement |
| Rooms | Room 101, Server Room, Break Room |
| Areas | Loading Dock, Assembly Line, Parking Lot |
| Sites | North Campus, Downtown Office, Remote Site |
| Vehicles | Truck 1, Service Van, Fleet Vehicle |
Accessing Location Management
- Navigate to Admin > Locations
- View all locations in your organization
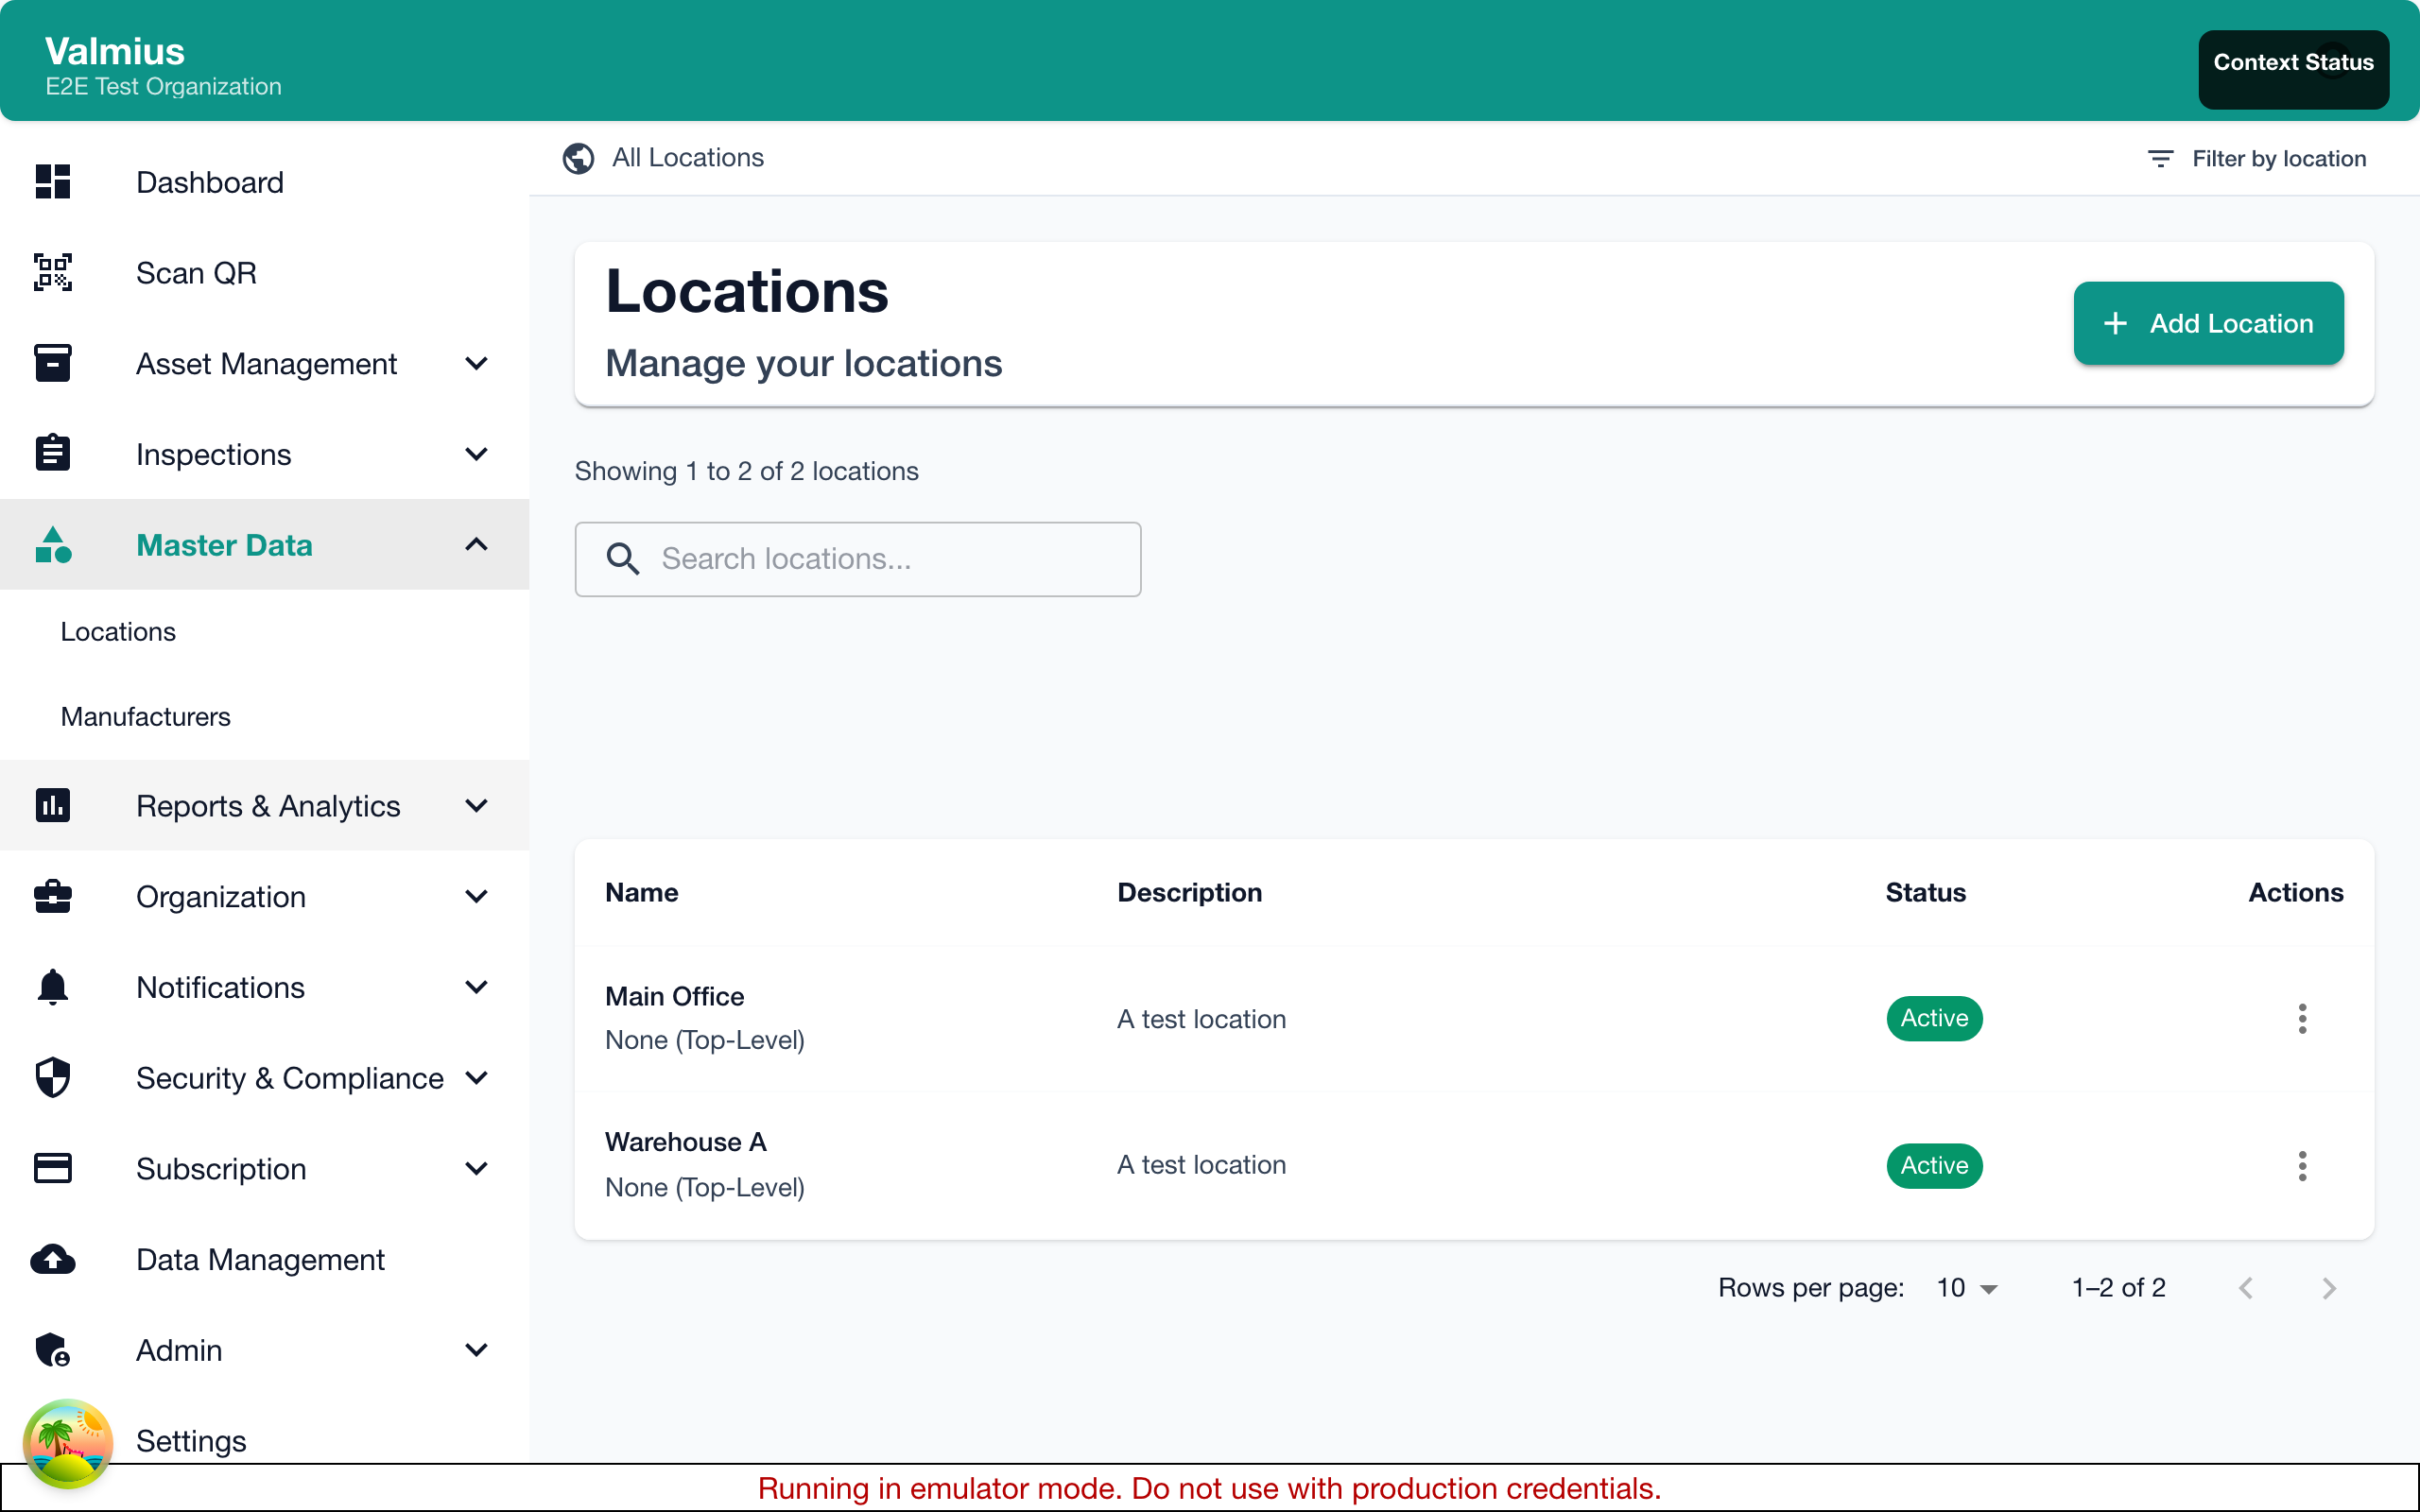
The Location List
The location list displays:
| Column | Description |
|---|---|
| Name | Location name |
| Parent | Parent location (for hierarchy) |
| Items | Number of items at this location |
| Description | Optional description |
Creating Locations
Creating a Single Location
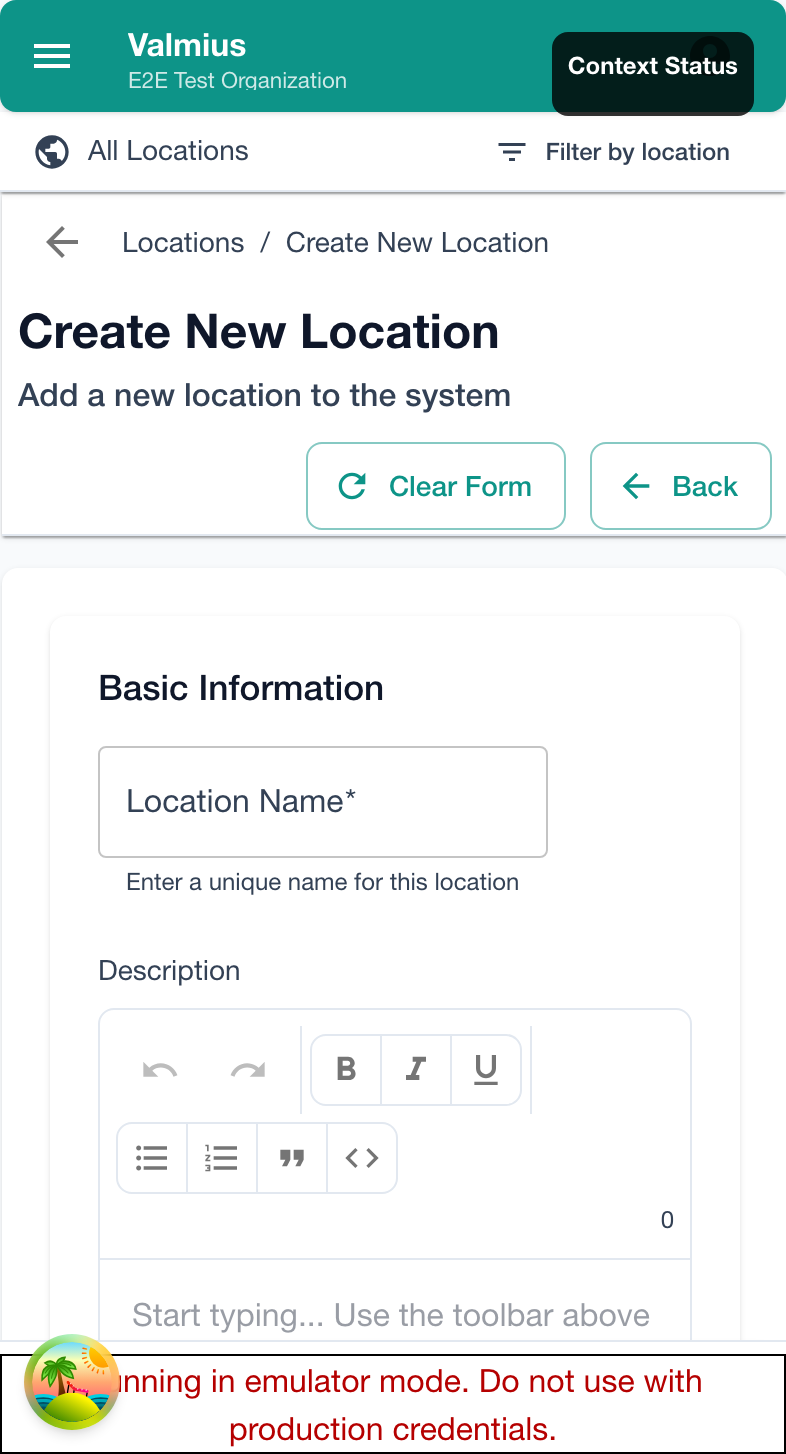
- Click Add Location
- Enter the location name
- Add a description (optional)
- Select a parent location (optional, for hierarchy)
- Click Save
Creating Child Locations
To create a nested structure:
- Click Add Location
- Enter the name
- Under Parent Location, select the parent
- Save
The new location appears nested under its parent.
Bulk Location Creation
For many locations:
- Click Import Locations
- Upload a CSV file with location data
- Map columns to fields
- Review and import
Location Hierarchy

Why Use Hierarchy
Hierarchical locations provide:
- Organized structure
- Inherited access (assign parent = access children)
- Aggregated reporting
- Logical grouping
Example Structure
Main Building
├── Floor 1
│   ├── Room 101
│   ├── Room 102
│   └── Break Room
├── Floor 2
│   ├── Room 201
│   └── Room 202
└── Basement
    └── Storage

Warehouse A
├── Loading Dock
├── Aisle 1
├── Aisle 2
└── Shipping Area
Depth Limits
You can nest locations up to 5 levels deep:
- Site
- Building
- Floor
- Area
- Room
This should accommodate most organizational structures.
Editing Locations
Changing Location Details
- Click on a location
- Update name or description
- Save changes
Moving a Location
To change a location's parent:
- Edit the location
- Select a new parent location
- Save
All child locations move with it.
Merging Locations
To combine two locations:
- Move all items from one location to the other
- Reassign any users restricted to the old location
- Delete the empty location
Deleting Locations
Prerequisites
Before deleting a location:
- Move or delete all items at that location
- Reassign any users restricted to that location
- Move or delete any child locations
Deleting
- Click on the location
- Click Delete
- Confirm the deletion
Locations with items or child locations cannot be deleted. Remove these first.
Location-Based Features
User Access Restrictions
Restrict users to specific locations:
- Edit the user in Admin > Users
- Under Locations, select allowed locations
- Save
Users only see items at their assigned locations.
Location-Based Reports
Generate reports filtered by location:
- Go to Reports
- Select or create a report
- Filter by location
- Generate
Reports can cover a single location or a parent with all children.
Inspection by Location
View inspections by location:
- Go to Inspections
- Filter by location
- See all inspections at that location
Moving Items Between Locations
When equipment is relocated:
Single Item
- Open the item's details
- Click Edit
- Select the new location
- Save
Multiple Items
- Go to Items
- Select multiple items (checkboxes)
- Click Bulk Actions > Change Location
- Select the new location
- Confirm
Location History
Location changes are recorded in the item's event history, showing:
- Previous location
- New location
- Date/time of change
- Who made the change
Best Practices
Naming Conventions
Use consistent, clear names:
| Good | Avoid |
|---|---|
| Building A - Floor 1 | Bldg A F1 |
| Main Warehouse | MW1 |
| Server Room 101 | SR |
Structure Guidelines
- Start broad - Create top-level locations first
- Add detail as needed - Don't over-organize initially
- Be consistent - Use the same structure across similar sites
- Plan for growth - Leave room for expansion
For Multi-Site Organizations
- Create a top-level location for each site
- Use consistent sub-structures across sites
- Use location restrictions to separate site teams
- Consider location in reporting and dashboards
For Single-Site Organizations
- Keep structure simple
- Only add levels that provide value
- Location restrictions may not be necessary
- Focus on logical equipment groupings
Troubleshooting
Can't Delete a Location
Check for:
- Items still at the location
- Child locations that need moving
- Users restricted to that location
Items Not Appearing
Check:
- The item's current location assignment
- User's location restrictions
- Filter settings on the item list
Location Hierarchy Issues
If hierarchy seems broken:
- Check parent assignments are correct
- Verify no circular references
- Review for duplicate location names
Import/Export
Exporting Locations
- Go to Admin > Locations
- Click Export
- Choose format (CSV or Excel)
- Download
Import Format
CSV file should include:
Name,Parent,Description
"Main Building",,""
"Floor 1","Main Building","First floor offices"
"Room 101","Floor 1","Conference room"
Next Steps
- Users - Assigning users to locations
- Permissions - Location-based access control
- Items - Viewing items by location