Item Types
Learn how to create and manage item types in Kuviq.
Overview
Item types categorize your equipment and define:
- What information is tracked for each item
- Custom fields specific to that equipment
- Which inspection templates are available
- Default behaviors for items of that type
Why Use Item Types
Organization Benefits
- Consistent data - Same fields for similar equipment
- Easier searching - Filter by equipment category
- Appropriate inspections - Match templates to equipment
- Reporting - Analyze by equipment type
Example Item Types
| Industry | Item Types |
|---|---|
| Fire Safety | Fire Extinguisher, Emergency Light, Smoke Detector |
| Construction | Ladder, Scaffold, Power Tool, Safety Harness |
| Fleet | Truck, Van, Forklift, Trailer |
| Healthcare | Medical Device, Emergency Equipment, PPE |
| Hospitality | Kitchen Equipment, Safety Equipment, HVAC |
Accessing Item Types
- Navigate to Admin > Item Types
- View all configured item types
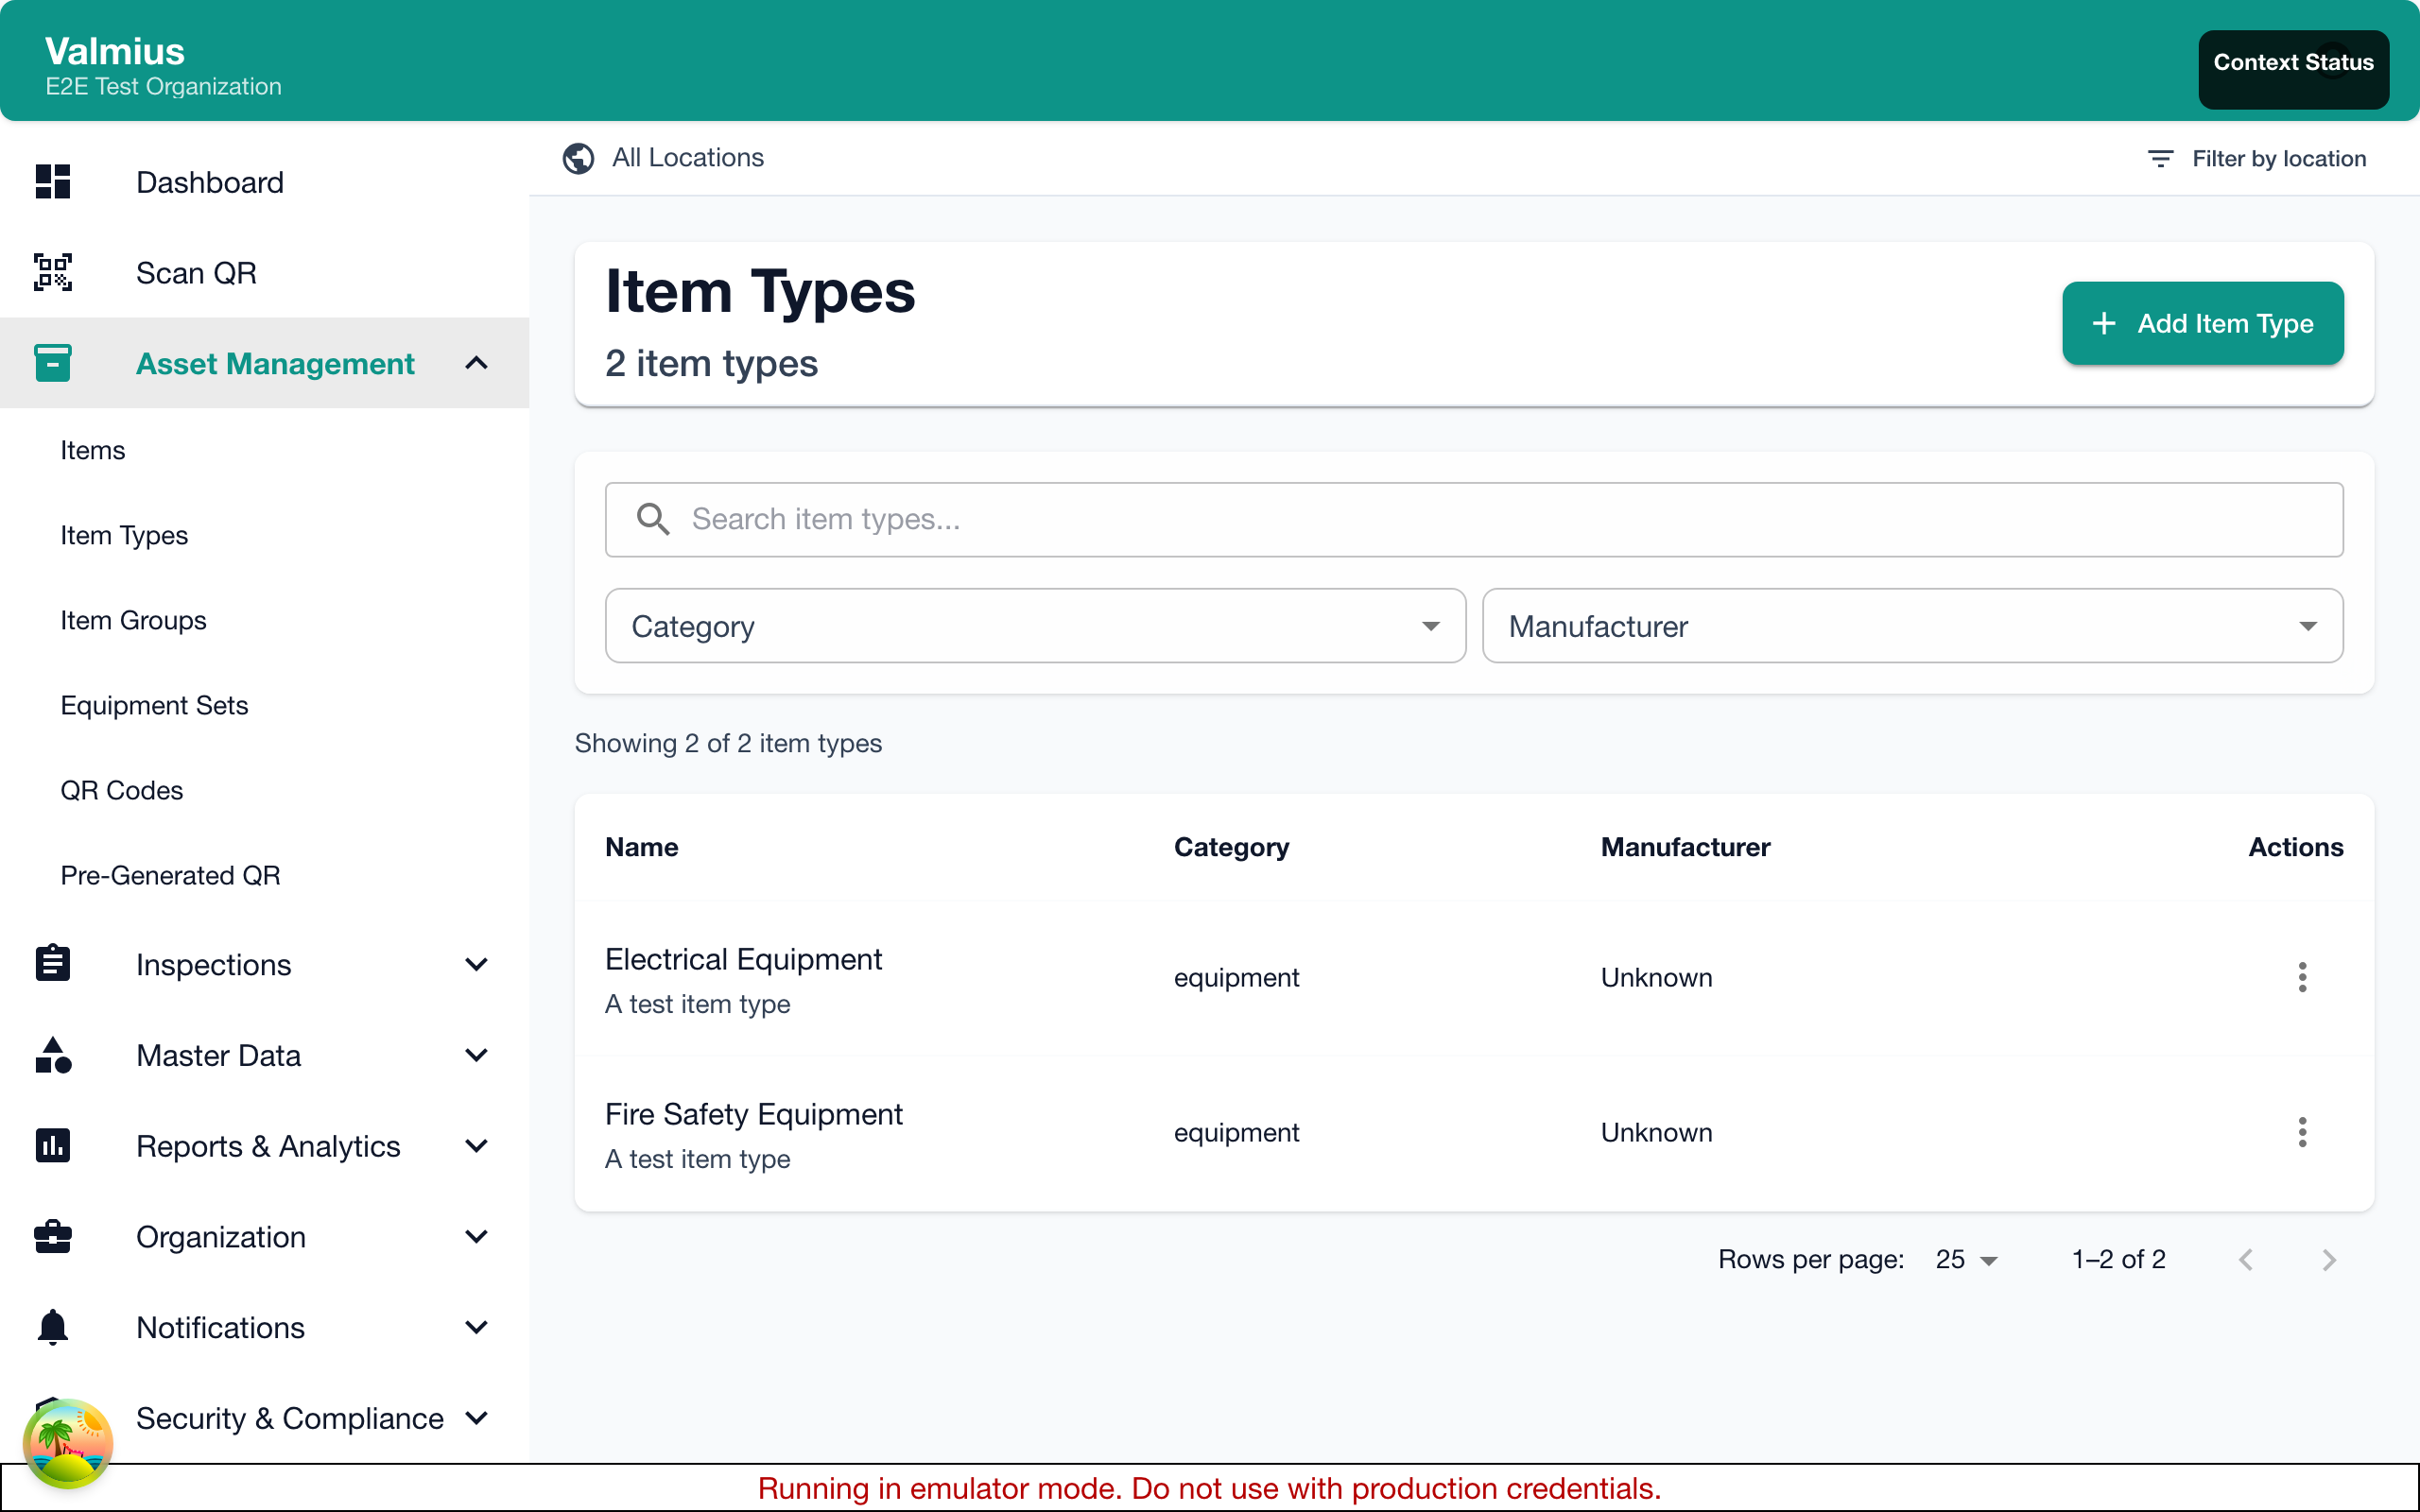
The Item Type List
The list shows:
| Column | Description |
|---|---|
| Name | Item type name |
| Items | Number of items using this type |
| Custom Fields | Number of custom fields defined |
| Default Template | Associated inspection template |
Creating an Item Type
Basic Setup
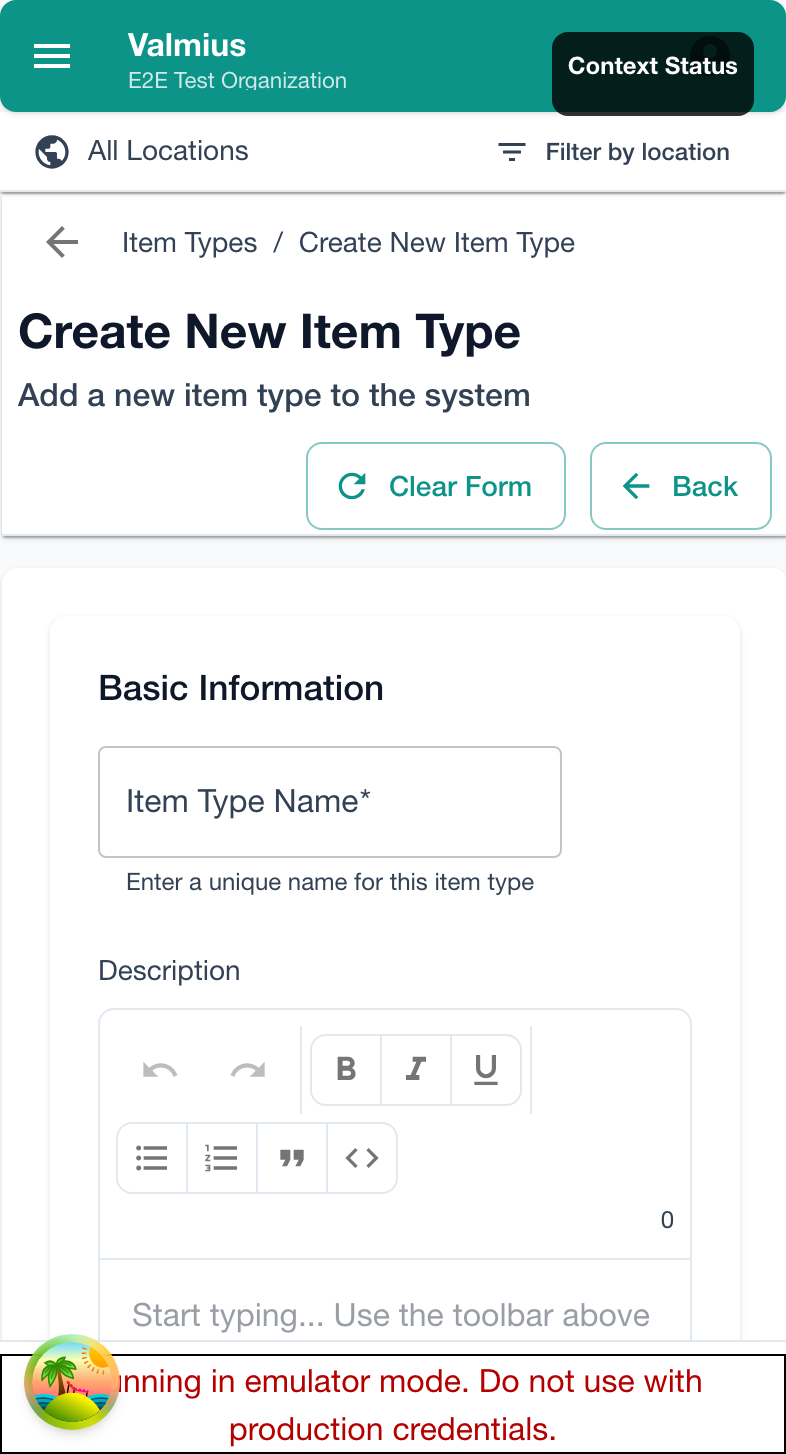
- Click Add Item Type
- Enter the type name (e.g., "Fire Extinguisher")
- Add a description explaining what this type is for
- Click Save
Naming Best Practices
| Good Names | Avoid |
|---|---|
| Fire Extinguisher | FE |
| Portable Ladder | Ladder Type 1 |
| Safety Harness | Harness |
| Medical AED | Device |
Be specific and use names everyone will understand.
Custom Fields
Custom fields capture information specific to an item type.
Adding Custom Fields
- Edit the item type
- Click Add Custom Field
- Configure the field:
- Name - What to call the field
- Type - Field type (see below)
- Required - Must be filled when creating items
- Help Text - Instructions for users
- Save
Field Types
| Type | Use For | Example |
|---|---|---|
| Text | Short text | Model number, Serial |
| Number | Numeric values | Capacity, Weight |
| Date | Dates | Expiry date, Purchase date |
| Dropdown | Selection from list | Size (S/M/L), Rating |
| Checkbox | Yes/no | In warranty, Calibrated |
| Long Text | Paragraphs | Notes, Description |
Dropdown Options
For dropdown fields:
- Select "Dropdown" as the type
- Add options one at a time
- Set a default value (optional)
- Arrange option order
Field Order
Fields appear in the order you define them:
- Drag fields to reorder
- Put important fields first
- Group related fields together
Required Fields
Mark fields as required when:
- Data is essential for the item
- Inspections need the information
- Reports depend on the field
Don't mark everything required—it slows down data entry.
Example Custom Fields
Fire Extinguisher
| Field | Type | Required |
|---|---|---|
| Agent Type | Dropdown (Water, Foam, CO2, Powder) | Yes |
| Capacity (kg) | Number | Yes |
| Last Service Date | Date | Yes |
| Manufacture Date | Date | No |
| Service Provider | Text | No |
Vehicle
| Field | Type | Required |
|---|---|---|
| License Plate | Text | Yes |
| VIN | Text | No |
| Mileage | Number | No |
| Fuel Type | Dropdown (Gasoline, Diesel, Electric) | Yes |
| Registration Expiry | Date | Yes |
Ladder
| Field | Type | Required |
|---|---|---|
| Type | Dropdown (Step, Extension, Platform) | Yes |
| Height (m) | Number | Yes |
| Material | Dropdown (Aluminum, Fiberglass, Wood) | Yes |
| Max Load (kg) | Number | No |
| Last Load Test | Date | No |
Manufacturer Association
Link item types to relevant manufacturers:
- Edit the item type
- Under Manufacturers, select applicable manufacturers
- Save
When creating items of this type, only these manufacturers appear in the dropdown.
Inspection Template Association
Default Template
Set a default inspection template:
- Edit the item type
- Under Default Inspection Template, select a template
- Save
This template is pre-selected when creating inspections for items of this type.
Multiple Templates
Some item types may need different inspections:
- Daily checks vs. annual inspections
- Different inspections based on location
- Regulatory vs. operational inspections
All templates remain available; the default is just pre-selected.
Editing Item Types
Changing Basic Information
- Click on the item type
- Update name or description
- Save
Modifying Custom Fields
Adding new fields:
- Edit the item type
- Add the new field
- Save
New fields appear on existing items (initially empty).
Editing existing fields:
- You can change labels and help text
- You can add dropdown options
- Changing field types may lose data
Removing fields:
- Edit the item type
- Delete the field
- Save
Removing a field deletes that data from all items of this type. Export data first if needed.
Deleting Item Types
Prerequisites
Before deleting an item type:
- Reassign all items to another type, OR
- Delete all items of that type
Deleting
- Click on the item type
- Click Delete
- Confirm
Deleting an item type is permanent. Make sure all items are reassigned first.
Bulk Operations
Import Item Types
- Click Import
- Upload a CSV or Excel file
- Map columns to fields
- Review and import
Export Item Types
- Click Export
- Choose format
- Download
Export includes item type configuration, not the items themselves.
Best Practices
Design Principles
- Keep it simple - Only create types you need
- Be consistent - Use standard naming across types
- Plan custom fields - Think about reporting needs
- Start minimal - Add fields as needs become clear
For Different Organization Sizes
Small organizations:
- 5-10 item types is typical
- Focus on major equipment categories
- Minimal custom fields
Large organizations:
- May have 20-50+ item types
- More detailed custom fields
- Consider regulatory requirements
Avoid These Mistakes
- Too many types - Creates confusion
- Too many fields - Slows data entry
- Vague names - Hard to find the right type
- Missing required fields - Incomplete data
Migration and Changes
Adding Item Types Later
You can add item types anytime. Existing items aren't affected.
Changing Item Types
To change an item's type:
- Edit the item
- Select the new type
- Fill in any required fields for the new type
- Save
Custom field data from the old type is preserved but not visible.
Merging Item Types
To combine two types:
- Change all items from one type to the other
- Delete the empty type
Troubleshooting
Can't Delete Item Type
- Check for items still using this type
- Reassign or delete those items first
Custom Field Not Appearing
- Check field is saved
- Refresh the page
- Verify field isn't hidden by permissions
Data Not Showing in Reports
- Ensure field is populated on items
- Check report includes this item type
- Verify field type matches report expectations
Next Steps
- Inspection Templates - Create inspections for types
- Manufacturers - Set up manufacturers
- Creating Items - Use item types